Difference between revisions of "ACKsess"
(added description and todo) |
m (whoops, double outdated) |
||
| (18 intermediate revisions by 2 users not shown) | |||
| Line 1: | Line 1: | ||
| + | {{Marked as outdated|This project has been decomissioned and superseeded by [[Acksess_2.0]]. It had a good ride.}} | ||
{{Project | {{Project | ||
| − | |State= | + | |Featured=No |
| − | |Members=Vicarious,Prodigity,xopr | + | |State=Completed |
| + | |Members=Vicarious, Prodigity, xopr, Stuiterveer, Jetse, | ||
|Description=Knock knock. | |Description=Knock knock. | ||
| + | |GitHub=acksess | ||
| + | |Picture=ACKsess_3.jpg | ||
}} | }} | ||
| − | + | == synopsis == | |
knock knock. | knock knock. | ||
| − | + | == current implementation == | |
The now working ACKsess implementation has several advantages over the old broken one, that broke. | The now working ACKsess implementation has several advantages over the old broken one, that broke. | ||
* Heartbeat: it pulsates the LED every 5 seconds or so, to indicate it's active | * Heartbeat: it pulsates the LED every 5 seconds or so, to indicate it's active | ||
| − | * Better feedback ( | + | * Better feedback (blink if door is unlocked) |
| − | * Brute force protection (locks | + | * Brute force protection (locks 10 seconds after a failed authentication, pulsates very fast as a tamper indication) |
* Faster response (shortened the delay for faster response) | * Faster response (shortened the delay for faster response) | ||
* Opens on powerup/reset. This way, the reset button can be used to open the door | * Opens on powerup/reset. This way, the reset button can be used to open the door | ||
* Various code cleanup/alignment/update | * Various code cleanup/alignment/update | ||
| + | * it beeps (as a helping aid)! | ||
| + | * it works stand-alone now together with an I<sup>2</sup>C display from [[User:Xopr|xopr]]'s project crate (serial still supported) | ||
| + | The door is connected to fuse group [[Fuse group::A]]. | ||
| − | === | + | === mode of operation === |
| − | + | * the door has 2 modes of operation: NORMAL and ADMIN (to be unlocked with a master key) | |
| + | * once in ADMIN mode, there are two states: KEY set or unset | ||
| + | * ADMIN mode starts with no key set; also, long-press firebutton will unset a currently set key | ||
| + | * if no key is set, one can exit ADMIN mode by placing the master key | ||
| + | * one can set a key (for administration) by placing a new iButton, or (short) pressing the firebutton to cycle through the existing keys | ||
| + | * a set key can be deleted by placing the master key | ||
| − | = | + | {|class="wikitable" |
| − | + | ! mode !! iButton !! firebutton !! long press firebutton !! master key !! firebutton + master key !! Note | |
| − | + | |- | |
| + | | NORMAL || open || open || open || open || go to ADMIN mode || display will show <code>ACKsess granted!</code> | ||
| + | |- | ||
| + | | ADMIN || add+set KEY || set next KEY || unset KEY || exit ADMIN mode |||| display will show <code>Program mode:add</code> | ||
| + | |- | ||
| + | | KEY set || add+set KEY || set next KEY || unset KEY || delete KEY |||| display will show the key's ID or upon delete: <code>Deleted @ <EEPROM index></code> | ||
| + | |} | ||
| − | + | ==== normal mode ==== | |
| + | * press the firebutton or put a valid key on the reader | ||
| + | * door will open | ||
| − | ==== | + | ==== admin mode ==== |
| + | * press and hold firebutton | ||
| + | * before the long beep ends, put a master key on the reader and hold both firmly | ||
| + | * an upward melody will play; release/remove buttons before it ends | ||
| + | * display will show <code>Program mode:add</code> | ||
| − | + | ==== exit admin mode ==== | |
| + | * put master button on the reader again | ||
| + | * a downward melody will play | ||
| + | |||
| + | ==== add keys ==== | ||
| + | * enter [[#admin mode]] | ||
| + | * put a new iButton on the reader | ||
| + | * a short high beep will sound upon adding | ||
| + | * display will show <code>Added @ <EEPROM index></code> and the key ID | ||
| + | * press firebutton long (>1s) or the key will be deleted again | ||
| + | * exit by putting master button on the reader again | ||
| + | |||
| + | ==== delete keys ==== | ||
| + | * press firebutton shortly to cycle through the keys | ||
| + | * display will show <code>Program mode:del</code> and the key ID | ||
| + | * put master key on the reader to confirm and go back to admin mode | ||
| + | * a low beep will sound upon deletion | ||
| + | * display will show <code>Deleted @ <EEPROM index></code> | ||
| + | |||
| + | ==== exit delete keys without deleting keys ==== | ||
| + | * '''to go to admin mode without deleting keys: press firebutton long (>1s)''' | ||
| + | |||
| + | === images === | ||
| + | Some images | ||
| + | <gallery> | ||
| + | File:ACKsess_1.jpg|iButton reader inside the door handle hole | ||
| + | File:ACKsess_2.jpg|first version of door lock mechanism | ||
| + | File:ACKsess_3.jpg|Awesome door handle (press fire to open) | ||
| + | File:ACKsess_4.jpg|First joystick internals | ||
| + | File:ACKsess_5.jpg|THEREIFIXEDIT (first version broke) | ||
| + | File:ACKsess_6.jpg|Latest version backside | ||
| + | </gallery> | ||
| + | |||
| + | |||
| + | === hardware === | ||
| + | The joystick contains a print that fits snugly, with an Arduino pro mini. | ||
| + | The print has print connectors, so everything can pop off easy. | ||
| + | You can use an [[FTDI]] USB to serial adapter (115200 baud) or the dedicated I<sup>2</sup>C LCD for debugging and key management. | ||
| + | |||
| + | ==== Joystick PCB ==== | ||
| + | |||
| + | The PCB receives power, and uses a 7805 to power the Arduino. | ||
'''Arduino pins''' | '''Arduino pins''' | ||
| − | + | :2: reader pin: reader 'data' pin, 4k7 pull up to 5v | |
| − | + | :3: led pin: uses pwm heart beat every 5 seconds and blinks fast if the door is unlocked | |
| − | + | :4: button pin: for use for external opener, pullup (connect to ground to trigger) | |
| − | + | :5: relay pin: set high to pull relay pin to low | |
| − | + | :9: buzzer pin: for audio feedback | |
| − | |||
| − | |||
| − | |||
| − | |||
| − | |||
| − | |||
| − | |||
| − | |||
| − | |||
| − | |||
| − | |||
| − | |||
| − | |||
| − | |||
| − | |||
* The NPN transistor used is a BC548 (goes up to 500mA), drived with a 100-300 something ohm resistor on the base (from the top of my head). | * The NPN transistor used is a BC548 (goes up to 500mA), drived with a 100-300 something ohm resistor on the base (from the top of my head). | ||
* Note that is has a diode (1n4000 something) antiparallel between collector and emittor as coil reverse voltage protection | * Note that is has a diode (1n4000 something) antiparallel between collector and emittor as coil reverse voltage protection | ||
* The onewire pull up used is 4k7 to 5v | * The onewire pull up used is 4k7 to 5v | ||
| − | + | ==== DS9092L iButton probe ==== | |
I had to reverse engineer the wiring somewhat (connector was gone), but here it is: | I had to reverse engineer the wiring somewhat (connector was gone), but here it is: | ||
[http://datasheets.maximintegrated.com/en/ds/DS9092L.pdf DS9092L iButton probe datasheet] | [http://datasheets.maximintegrated.com/en/ds/DS9092L.pdf DS9092L iButton probe datasheet] | ||
| Line 67: | Line 117: | ||
| − | + | === software === | |
| − | Most of ACKsess.ino: | + | Most of ACKsess.ino (old code): |
<pre> | <pre> | ||
#include <OneWire.h> | #include <OneWire.h> | ||
| − | const int relayPin = | + | const int relayPin = 5; // the number of the relay pin |
| − | const int ledPin = | + | const int ledPin = 3; // the number of the LED pin (change to 13 to see the onboard led) |
| − | const int readerPin = | + | const int readerPin = 2; // the number of the iButton reader pin |
| − | const int buttonPin = | + | const int buttonPin = 4; // the number of the pushbutton pin |
| + | const int buzzerPin = 9; // the number of the buzzer pin | ||
OneWire ds( readerPin ); | OneWire ds( readerPin ); | ||
| Line 81: | Line 132: | ||
String keyStatus = ""; | String keyStatus = ""; | ||
| − | // | + | byte allowedButtons[][6] = { |
| − | byte | + | /* ADD YOUR BUTTONS TO AUTHORIZE HERE */ |
| − | /* ADD | + | }; |
| + | |||
| + | byte disallowedButtons[][6] = { | ||
| + | /* ADD THE BUTTONS TO IGNORE HERE */ | ||
}; | }; | ||
void setup(void) | void setup(void) | ||
{ | { | ||
| − | Serial.begin( 115200 ); | + | Serial.begin(115200); |
pinMode( buttonPin, INPUT_PULLUP ); | pinMode( buttonPin, INPUT_PULLUP ); | ||
pinMode( ledPin, OUTPUT ); | pinMode( ledPin, OUTPUT ); | ||
| Line 95: | Line 149: | ||
Serial.println( "ACKsess initialized" ); | Serial.println( "ACKsess initialized" ); | ||
Serial.print( "number of keys: " ); | Serial.print( "number of keys: " ); | ||
| − | Serial.println( sizeof( | + | Serial.println( sizeof( allowedButtons ) / 6 ); |
// Open the door upon power up and (on board) reset | // Open the door upon power up and (on board) reset | ||
| − | openDoor( ); | + | openDoor( true ); |
} | } | ||
byte nState = 0; | byte nState = 0; | ||
byte nLedVal = 0; | byte nLedVal = 0; | ||
| − | + | bool bTamper = false; | |
void loop(void) | void loop(void) | ||
{ | { | ||
| Line 113: | Line 167: | ||
nState++; | nState++; | ||
| − | analogWrite( ledPin, nLedVal ); | + | if ( bTamper ) |
| + | analogWrite( ledPin, nLedVal & 32 ); | ||
| + | else | ||
| + | analogWrite( ledPin, nLedVal ); | ||
| + | |||
delay( 1 ); | delay( 1 ); | ||
break; | break; | ||
| Line 122: | Line 180: | ||
nState++; | nState++; | ||
| − | analogWrite( ledPin, nLedVal ); | + | if ( bTamper ) |
| − | + | analogWrite( ledPin, nLedVal & 32 ); | |
| + | else | ||
| + | analogWrite( ledPin, nLedVal ); | ||
| + | |||
| + | delay( 1 ); | ||
break; | break; | ||
| Line 138: | Line 200: | ||
// If the external button was pushed, open the door | // If the external button was pushed, open the door | ||
if ( digitalRead( buttonPin ) == LOW ) | if ( digitalRead( buttonPin ) == LOW ) | ||
| − | openDoor( ); | + | openDoor( true ); |
// Check keys twice each fade and on every idle state step | // Check keys twice each fade and on every idle state step | ||
| Line 151: | Line 213: | ||
for( byte i = 5; i > 0; i--) | for( byte i = 5; i > 0; i--) | ||
{ | { | ||
| − | Serial.print(":"); | + | Serial.print( ":" ); |
Serial.print(addr[i], HEX); | Serial.print(addr[i], HEX); | ||
} | } | ||
| − | Serial.println(""); | + | Serial.println( "" ); |
// Either open the door, or lock the system for 30 seconds | // Either open the door, or lock the system for 30 seconds | ||
| − | if ( authenticateKey( addr ) ) | + | if ( authenticateKey( addr, false ) ) |
{ | { | ||
| − | openDoor( ); | + | bTamper = false; |
| + | openDoor( false ); | ||
} | } | ||
| − | else | + | else if ( !authenticateKey( addr, true ) ) |
{ | { | ||
| + | bTamper = true; | ||
Serial.println( "ACKsess denied!" ); | Serial.println( "ACKsess denied!" ); | ||
| + | tone( buzzerPin, 600, 3000 ); | ||
delay( 30000 ); | delay( 30000 ); | ||
| + | } | ||
| + | else | ||
| + | { | ||
| + | Serial.println( "ACKsess filtered" ); | ||
| + | tone( buzzerPin, 600, 500 ); | ||
| + | delay( 1000 ); | ||
| + | tone( buzzerPin, 600, 500 ); | ||
| + | delay( 1000 ); | ||
| + | tone( buzzerPin, 600, 1000 ); | ||
} | } | ||
} | } | ||
| Line 170: | Line 244: | ||
} | } | ||
| − | void openDoor() | + | void openDoor( bool _buttonPressed ) |
{ | { | ||
| − | Serial.println( "ACKsess!" ); | + | Serial.println( "ACKsess granted!" ); |
// Trigger the relay | // Trigger the relay | ||
| Line 178: | Line 252: | ||
// Blink the led fast for about 3 seconds | // Blink the led fast for about 3 seconds | ||
| − | for ( byte n = 0; n < | + | for ( byte n = 0; n < 3; n++ ) // 250+250*6 500+500*3 |
{ | { | ||
digitalWrite( ledPin, HIGH ); | digitalWrite( ledPin, HIGH ); | ||
| − | delay( | + | tone( buzzerPin, 1000, 250 ); |
| + | delay( 250 ); | ||
digitalWrite( ledPin, LOW ); | digitalWrite( ledPin, LOW ); | ||
| − | delay( | + | delay( 250 ); |
} | } | ||
| Line 212: | Line 287: | ||
} | } | ||
| − | boolean authenticateKey( byte* _button ) | + | boolean authenticateKey( byte* _button, bool _includeIgnore ) |
{ | { | ||
/* SECURITY THROUGH OBSCURITY, VISIT US TO SEE SOME EXAMPLES */ | /* SECURITY THROUGH OBSCURITY, VISIT US TO SEE SOME EXAMPLES */ | ||
| Line 219: | Line 294: | ||
</pre> | </pre> | ||
| − | + | === todo === | |
| − | * | + | * redundant power supply (in case of power failure) |
| − | * | + | ** adding a battery (implement stand-by mode, might need a refit of the pull-up) |
| − | * | + | ** power on LED indicator (for detecting power loss separate from tamper) |
| − | * | + | * audit the authentication method (micros() and/or clock drift seed) |
| − | * | + | * add TVS diode (reader: yellow, GND: blue, VCC: orange-next-to-blue) |
| + | * allow admin access only if they are in EEPROM (but still allow key management) | ||
| + | * upload source to git | ||
| + | * add capacitive touch on the handle (grab & pull to open) | ||
| + | |||
| + | Location: [[Location::hACKspace]] (You've passed it on the way in) | ||
| + | [[Category:Arduino]] | ||
Latest revision as of 21:37, 5 June 2022
| Project: ACKsess | |
|---|---|
| Featured: | No |
| State | Completed |
| Members | Vicarious, Prodigity, xopr, Stuiterveer, Jetse |
| GitHub | acksess |
| Description | Knock knock. |
| Picture | |

| |
Contents
synopsis
knock knock.
current implementation
The now working ACKsess implementation has several advantages over the old broken one, that broke.
- Heartbeat: it pulsates the LED every 5 seconds or so, to indicate it's active
- Better feedback (blink if door is unlocked)
- Brute force protection (locks 10 seconds after a failed authentication, pulsates very fast as a tamper indication)
- Faster response (shortened the delay for faster response)
- Opens on powerup/reset. This way, the reset button can be used to open the door
- Various code cleanup/alignment/update
- it beeps (as a helping aid)!
- it works stand-alone now together with an I2C display from xopr's project crate (serial still supported)
The door is connected to fuse group A.
mode of operation
- the door has 2 modes of operation: NORMAL and ADMIN (to be unlocked with a master key)
- once in ADMIN mode, there are two states: KEY set or unset
- ADMIN mode starts with no key set; also, long-press firebutton will unset a currently set key
- if no key is set, one can exit ADMIN mode by placing the master key
- one can set a key (for administration) by placing a new iButton, or (short) pressing the firebutton to cycle through the existing keys
- a set key can be deleted by placing the master key
| mode | iButton | firebutton | long press firebutton | master key | firebutton + master key | Note |
|---|---|---|---|---|---|---|
| NORMAL | open | open | open | open | go to ADMIN mode | display will show ACKsess granted!
|
| ADMIN | add+set KEY | set next KEY | unset KEY | exit ADMIN mode | display will show Program mode:add
| |
| KEY set | add+set KEY | set next KEY | unset KEY | delete KEY | display will show the key's ID or upon delete: Deleted @ <EEPROM index>
|
normal mode
- press the firebutton or put a valid key on the reader
- door will open
admin mode
- press and hold firebutton
- before the long beep ends, put a master key on the reader and hold both firmly
- an upward melody will play; release/remove buttons before it ends
- display will show
Program mode:add
exit admin mode
- put master button on the reader again
- a downward melody will play
add keys
- enter #admin mode
- put a new iButton on the reader
- a short high beep will sound upon adding
- display will show
Added @ <EEPROM index>and the key ID - press firebutton long (>1s) or the key will be deleted again
- exit by putting master button on the reader again
delete keys
- press firebutton shortly to cycle through the keys
- display will show
Program mode:deland the key ID - put master key on the reader to confirm and go back to admin mode
- a low beep will sound upon deletion
- display will show
Deleted @ <EEPROM index>
exit delete keys without deleting keys
- to go to admin mode without deleting keys: press firebutton long (>1s)
images
Some images
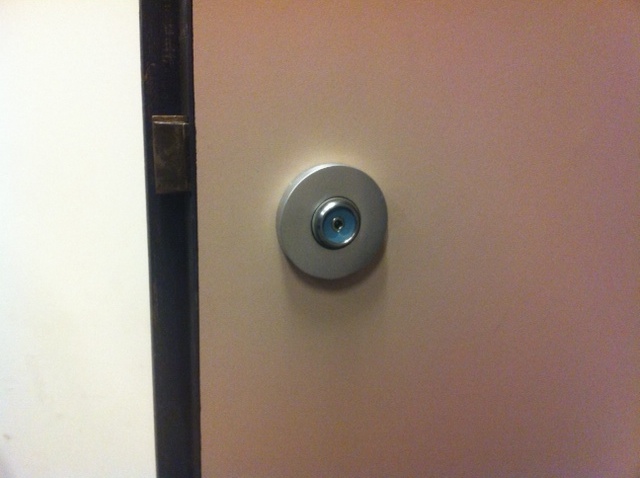
iButton reader inside the door handle hole
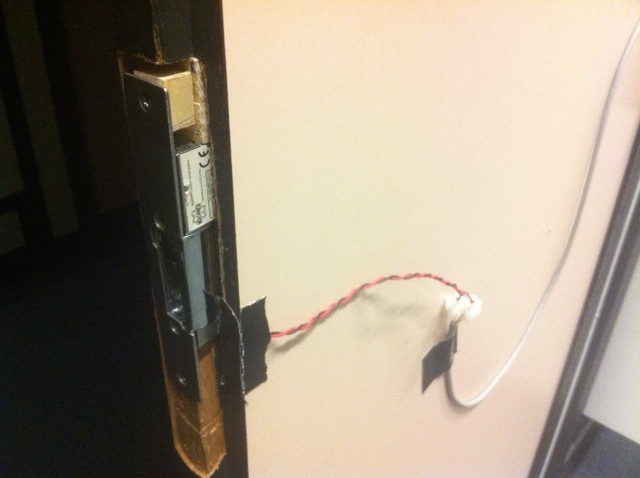
first version of door lock mechanism
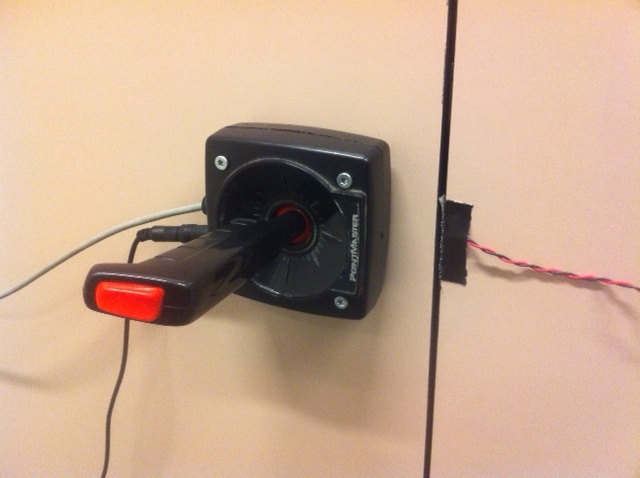
Awesome door handle (press fire to open)

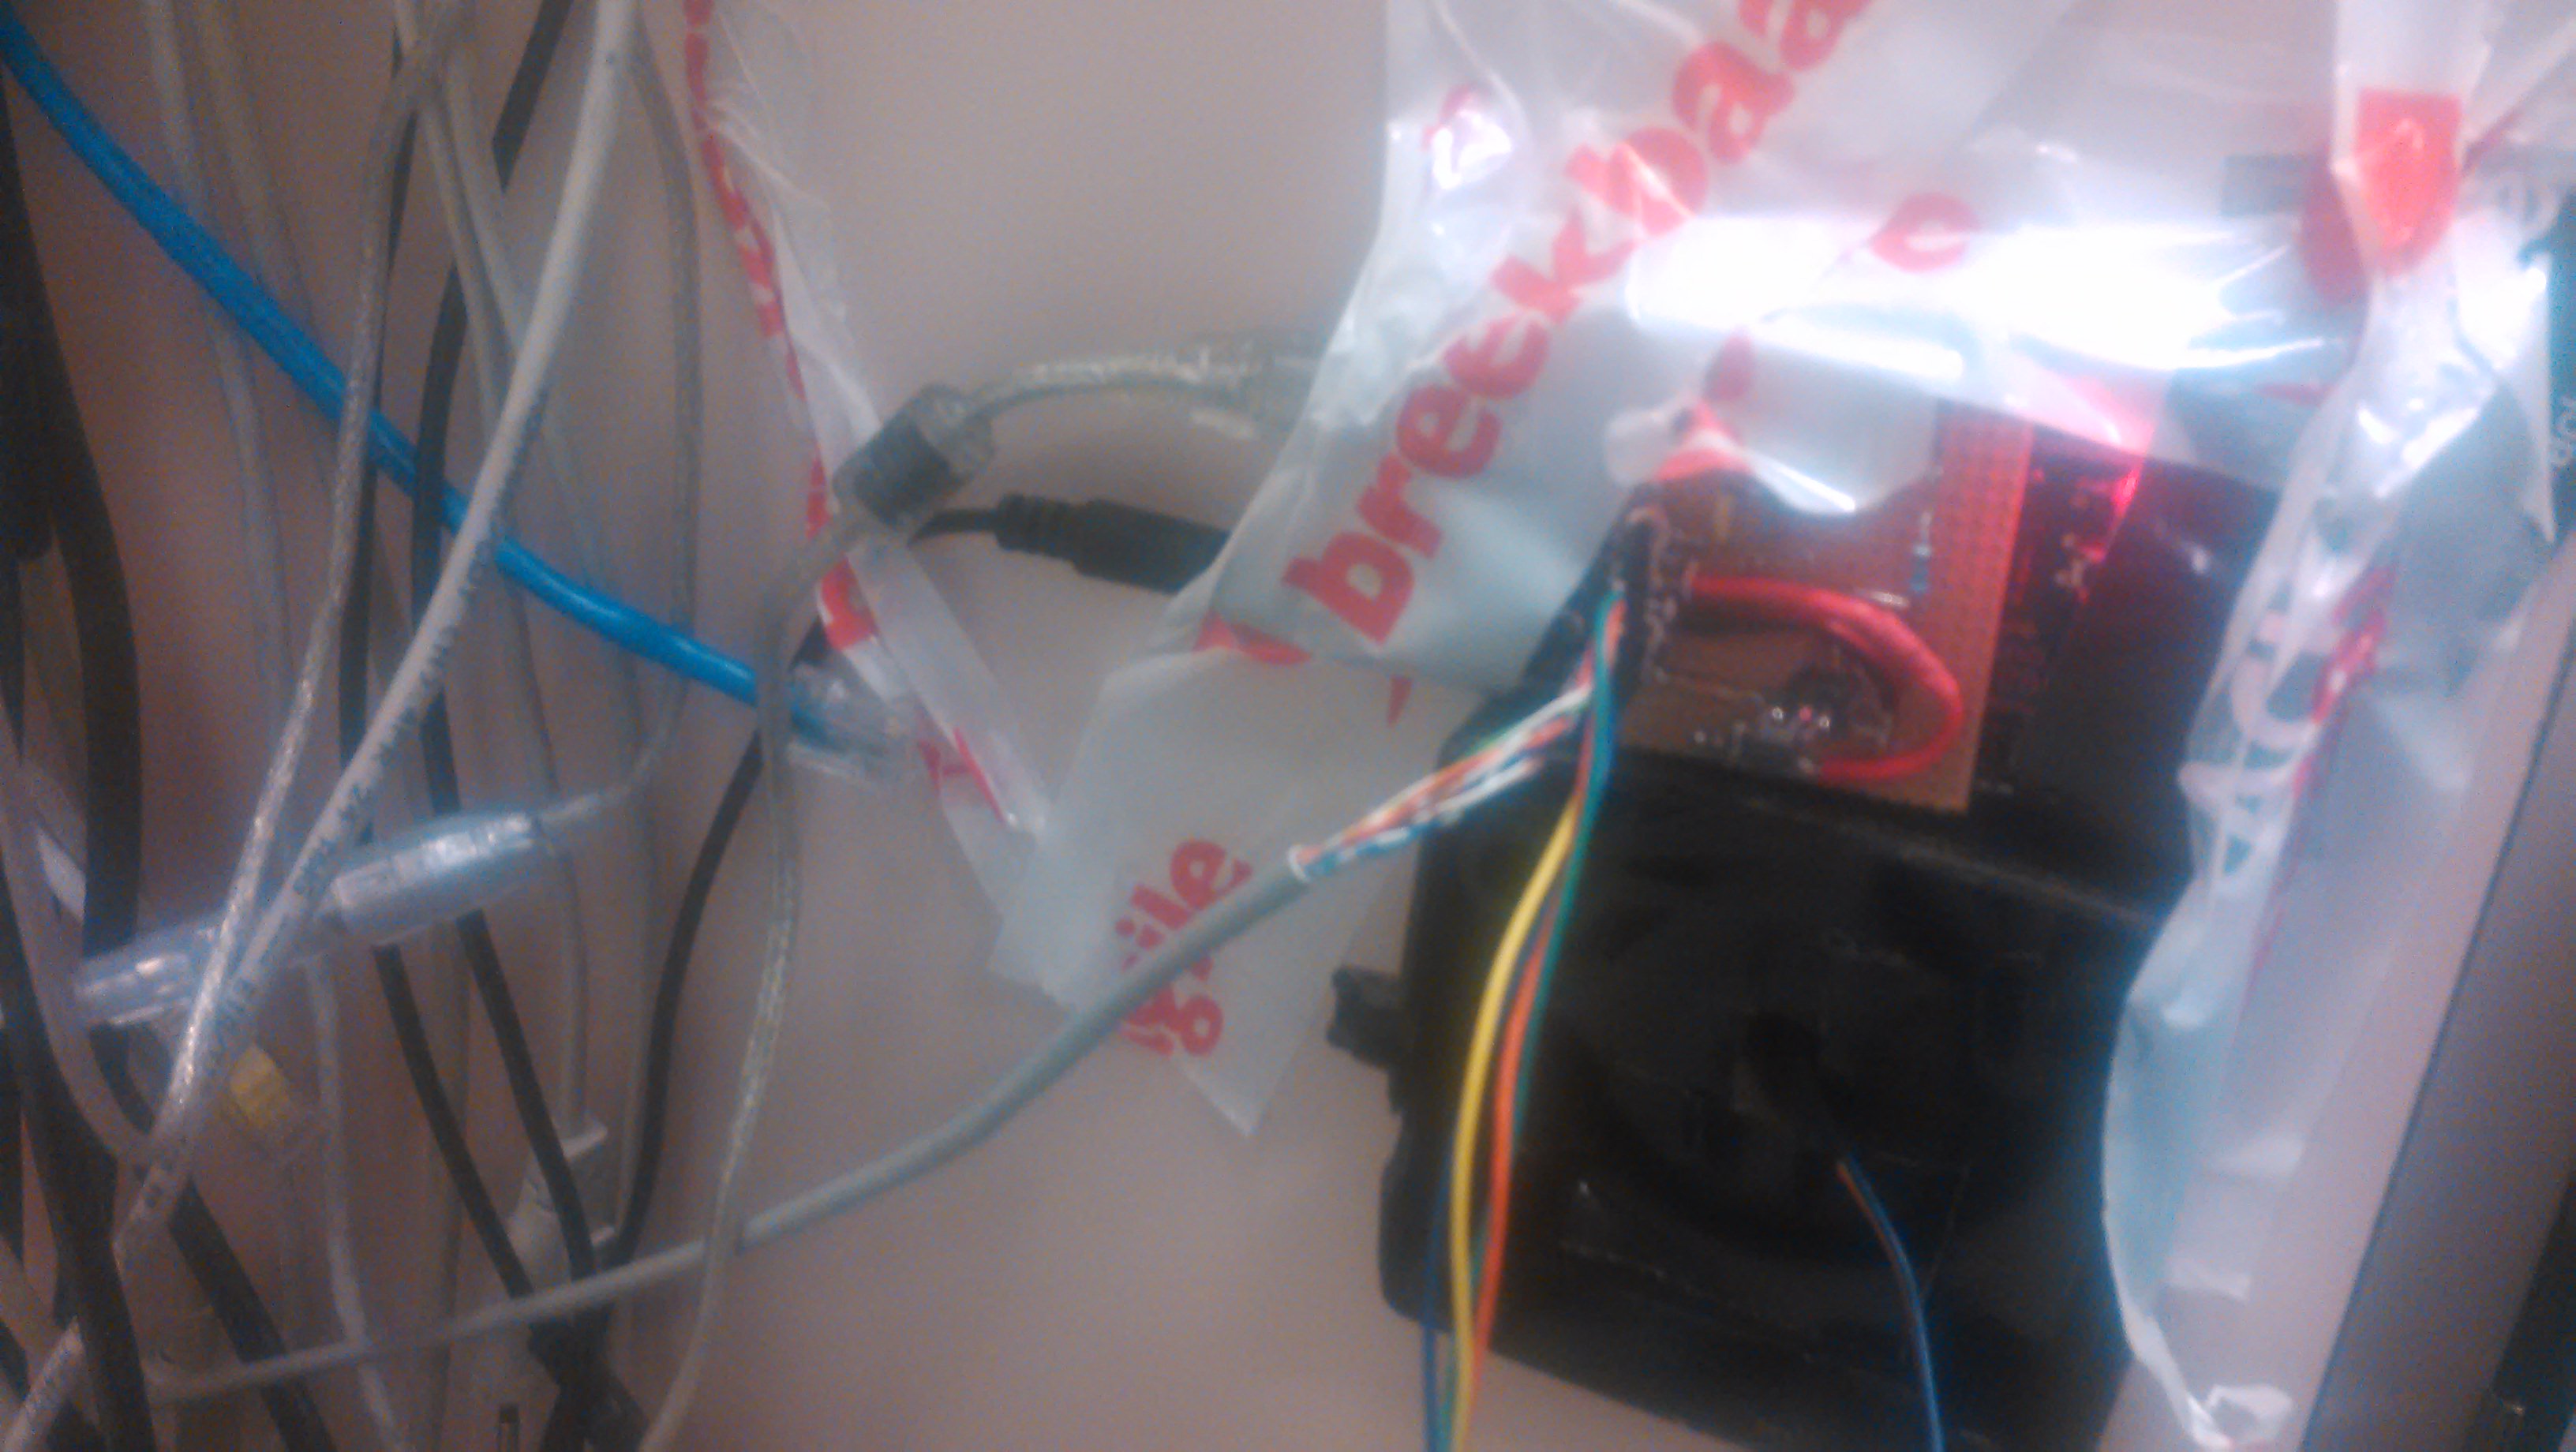
First joystick internals
THEREIFIXEDIT (first version broke)
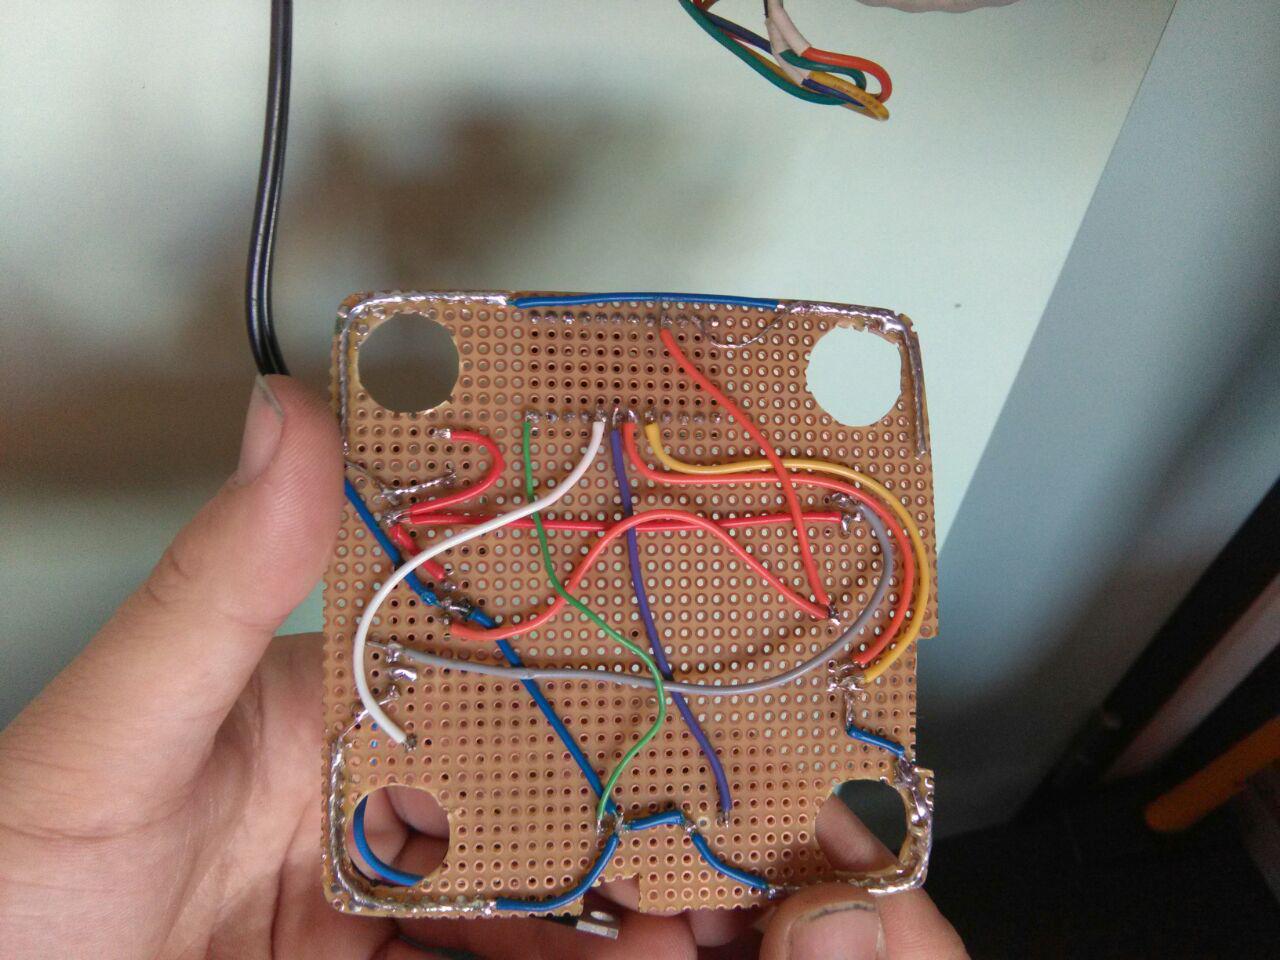
Latest version backside


hardware
The joystick contains a print that fits snugly, with an Arduino pro mini. The print has print connectors, so everything can pop off easy. You can use an FTDI USB to serial adapter (115200 baud) or the dedicated I2C LCD for debugging and key management.
Joystick PCB
The PCB receives power, and uses a 7805 to power the Arduino.
Arduino pins
- 2: reader pin: reader 'data' pin, 4k7 pull up to 5v
- 3: led pin: uses pwm heart beat every 5 seconds and blinks fast if the door is unlocked
- 4: button pin: for use for external opener, pullup (connect to ground to trigger)
- 5: relay pin: set high to pull relay pin to low
- 9: buzzer pin: for audio feedback
- The NPN transistor used is a BC548 (goes up to 500mA), drived with a 100-300 something ohm resistor on the base (from the top of my head).
- Note that is has a diode (1n4000 something) antiparallel between collector and emittor as coil reverse voltage protection
- The onewire pull up used is 4k7 to 5v
DS9092L iButton probe
I had to reverse engineer the wiring somewhat (connector was gone), but here it is: DS9092L iButton probe datasheet Pinout:
- GND (blue)
- Data (onewire) (green)
- LED cathode (-) (yellow)
- LED anode (+) (orange)
software
Most of ACKsess.ino (old code):
#include <OneWire.h>

const int relayPin  = 5;     // the number of the relay pin
const int ledPin    = 3;     // the number of the LED pin (change to 13 to see the onboard led)
const int readerPin = 2;     // the number of the iButton reader pin
const int buttonPin = 4;     // the number of the pushbutton pin
const int buzzerPin = 9;     // the number of the buzzer pin

OneWire ds( readerPin );
byte addr[ 8 ];
String keyStatus = "";

byte allowedButtons[][6] = {
  /* ADD YOUR BUTTONS TO AUTHORIZE HERE */
};

byte disallowedButtons[][6] = {
  /* ADD THE BUTTONS TO IGNORE HERE */
};

void setup(void)
{
  Serial.begin(115200);
  pinMode( buttonPin, INPUT_PULLUP );
  pinMode( ledPin, OUTPUT );
  pinMode( relayPin, OUTPUT );

  Serial.println( "ACKsess initialized" );
  Serial.print( "number of keys: " );
  Serial.println( sizeof( allowedButtons ) / 6 );

  // Open the door upon power up and (on board) reset
  openDoor( true );
}

byte nState = 0;
byte nLedVal = 0;
bool bTamper = false;
void loop(void)
{
  switch ( nState )
  {
    case 0: // forward, led fade in
      nLedVal++;
      if ( nLedVal >= 255 )
        nState++;

      if ( bTamper )
          analogWrite( ledPin, nLedVal & 32 );
      else
          analogWrite( ledPin, nLedVal );

      delay( 1 );
      break;

    case 1: // backward, led fade out
      nLedVal--;
      if ( nLedVal <= 0 )
        nState++;

      if ( bTamper )
        analogWrite( ledPin, nLedVal & 32 );
      else
        analogWrite( ledPin, nLedVal );

        delay( 1 );
      break;

    default: // idle
        nState++;
        delay( 500 );

        if ( nState >= 10 )
          nState = 0;

      break;
  };

  // If the external button was pushed, open the door
  if ( digitalRead( buttonPin ) == LOW )
    openDoor( true );

  // Check keys twice each fade and on every idle state step
  if ( (nLedVal == 127) || ( nState > 1 ) )
  {
    // Store the button info and read the keycode
    getKeyCode( );
    if( keyStatus == "ok" )
    {
      // We have a correct key type, authenticate it
      Serial.print("00");
      for( byte i = 5; i > 0; i--)
      {
        Serial.print( ":" );
        Serial.print(addr[i], HEX);
      }
      Serial.println( "" );

      // Either open the door, or lock the system for 30 seconds
      if ( authenticateKey( addr, false ) )
      {
        bTamper = false;
        openDoor( false );
      }
      else if ( !authenticateKey( addr, true ) )
      {
        bTamper = true;
        Serial.println( "ACKsess denied!" );
        tone( buzzerPin, 600, 3000 );
        delay( 30000 );
      }
      else
      {
        Serial.println( "ACKsess filtered" );
        tone( buzzerPin, 600, 500 );
        delay( 1000 );
        tone( buzzerPin, 600, 500 );
        delay( 1000 );
        tone( buzzerPin, 600, 1000 );
      }
    }
  }
}

void openDoor( bool _buttonPressed )
{
  Serial.println( "ACKsess granted!" );

  // Trigger the relay
  digitalWrite( relayPin, HIGH );

  // Blink the led fast for about 3 seconds
  for ( byte n = 0; n < 3; n++ )  // 250+250*6 500+500*3
  {
    digitalWrite( ledPin, HIGH );
    tone( buzzerPin, 1000, 250 );
    delay( 250 );
    digitalWrite( ledPin, LOW );
    delay( 250 );
  }

  // Relay off
  digitalWrite( relayPin, LOW );
}

void getKeyCode()
{
  byte present = 0;
  byte data[ 12 ];
  keyStatus="";

  if ( !ds.search( addr ) )
  {
    ds.reset_search( );
    return;
  }

  if ( OneWire::crc8( addr, 7) != addr[ 7 ] )
  {
    keyStatus = "CRC invalid";
    return;
  }

  keyStatus = "ok";
  ds.reset( );
}

boolean authenticateKey( byte* _button, bool _includeIgnore )
{
  /* SECURITY THROUGH OBSCURITY, VISIT US TO SEE SOME EXAMPLES */
  return false;
}
todo
- redundant power supply (in case of power failure)
- adding a battery (implement stand-by mode, might need a refit of the pull-up)
- power on LED indicator (for detecting power loss separate from tamper)
- audit the authentication method (micros() and/or clock drift seed)
- add TVS diode (reader: yellow, GND: blue, VCC: orange-next-to-blue)
- allow admin access only if they are in EEPROM (but still allow key management)
- upload source to git
- add capacitive touch on the handle (grab & pull to open)
Location: hACKspace (You've passed it on the way in)